“USA deports 21 students for discrepancies in visa documentation.” “Students deported from the US may face a five-year entry ban” (Reference articles from the renowned News Agencies in India). COVID protocols, US Customs and Border Protection, Immigration Office delays, and much more that are not on this list are all tiresome. Any bit of inconvenience at the airport is troublesome. Not knowing what customs are at an airport is the primary cause of such hefty disappointments.
We can go on and on and on! Now let us tell you something that is not baffling; you don’t have to be part of this nightmare, ever! This information is provided to you so you are better prepared and cautious.
The otherwise of these articles is the enjoyable side of the process and it can be your sweet experience. All you need to do is to read, understand, and thoroughly follow the below 5 steps (US Customs check-list). Let’s get started!
COVID Protocols (We are not done with COVID yet…)
You are hugely mistaken if you think COVID is done yet. America is one of those countries who are rigid about COVID and will be. You are more than expected to cooperate well.
We’ll begin by saying that the rules for COVID protocols undergo changes from time to time. And so we have the up-to-date information for you on the same.
Here are some latest COVID protocols at US airports:
- Get yourself fully vaccinated
- The US Center for Disease Control and Prevention suggests to relax back home until you are fully vaccinated
- The CDC (The US Center for Disease Control and Prevention advises putting on a high-quality mask) but totally optional
- Get the tests done (at least a day or two prior to your departure)
- You are mandated to get fully vaccinated with accepted COVID-19 vaccines
- Give your accurate contact information to the airline. So they can reach out to you immediately if they identify you are at risk for COVID-19 exposure
You are not expected to travel if:
- You fall sick (just before or while traveling)
- You have tested positive and yet to finish your are quarantine period
- Come in close contact with a person who has had COVID during the past 10 days, while the results are still pending
Note: Check out these both sites, CDC and the US Department of Homeland Security.
And your university may have a different set of COVID protocols that you need to follow.
Your Arrival – Step 1: Things To Get Ready Before You Touch Down
If you traveled internationally before then you should be familiar with this step. Once you land at the airport you’ll officially enter the United States through the port of entry.
You’ll be passed through the US Immigration checkpoint where the security and staff will check your passport, and visa and inspect your luggage.
Note: You must have all the required documents in hand to get them checked by the CBP agent when your turn comes.
Some instructions to follow:
- Keep all your important documents in the carry-on-luggage for quick access
- Don’t be negligent with your carry-on-luggage while you carry your original in the bag
- Take the originals with you to the US and keep of copy of them at home
- It is always advisable to fill out the custom declaration forms or immigration card that your airline provides before touching down
- When completing customs forms, be honest about the items you are bringing into the country to avoid any penalties and fines
- Make sure you fully understand the specifics of your visa, including its validity and any restrictions
These are a few handy instructions that will help minimize or even avoid any delays once you exit the plane.
“After Arrival – Step 2: Navigate the Immigration Checkpoint Process”
We can’t stress enough how important your documents are to clear immigration checkpoints for your further stay in the US. Homeland Security mandates international students to carry some potent documents with them. Make sure you have the following documents with you in your carry-on luggage:
- Visa
- Passport
- Form I-20
- Certificate of Eligibility for Nonimmigrant Students Status
- Letter of acceptance from the university you have been admitted to
- A copy of your fee payment
- Tuition and fee payment receipt
- SEVIS I-901 fee receipt
- Sealed certified academic transcripts
- English proficiency and other entrance exam scorecards
- Bank statements proving sufficient funds to finance your time living in the US
- If applicable, get customs letters or G-28 documentation included in your university acceptance set
The whole immigration and customs is a two-part verification process, so be sure to go through the Visa line while passing the immigration. Ideally, the first step would be the immigration checkpoint where airport staff will meticulously check your passport, visa, and I-20. Later, the 2nd part would be the customs and you’ll need to collect your luggage (duly checked) from the baggage terminal.
Note: If you enter the US in a different city that is not the city of your university then this is for you. The Port of entry is not your final destination; you’ll catch another flight where you’ll have to follow the domestic travel guidelines.
We highly recommend you go through the CDC’s latest domestic travel guidelines.

Step 3: Collecting the Luggage
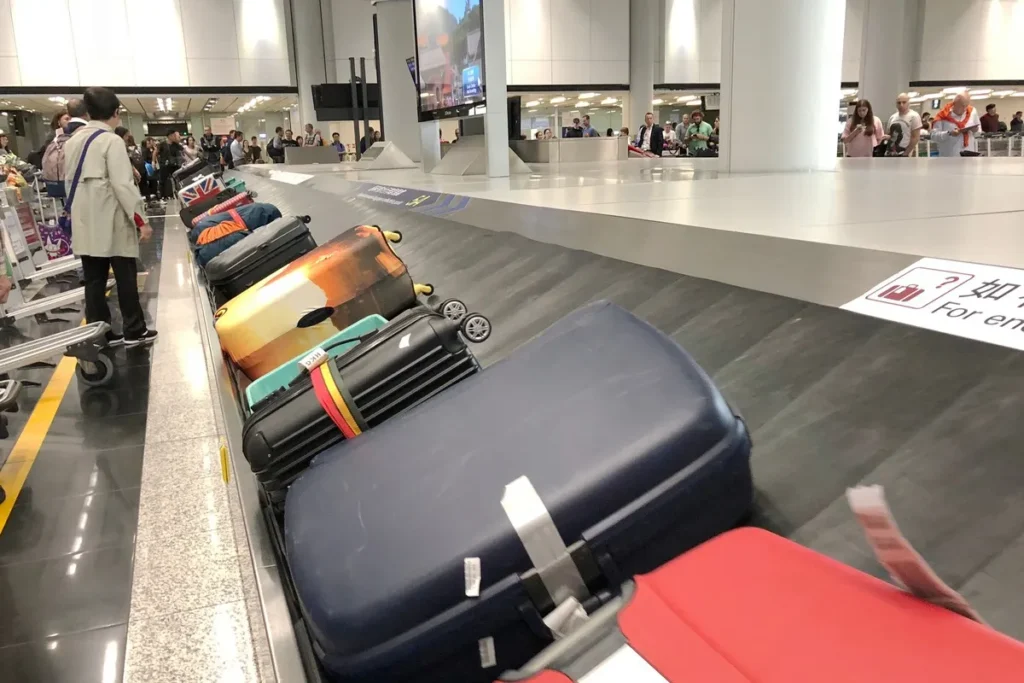
It doesn’t matter if you are a seasoned international traveler or if you are not you are sure to get confused when collecting your luggage. Here are a few general ways to find it, either follow the signage to get to your luggage or you can use a mobile baggage tracking app.
Finding the baggage terminal for your flight can be tricky in an unfamiliar airport. Look for signage that will lead you to your suitcases and other checked items, or find an airport employee or information booth to help you find where you need to go.
A few more additional tips so you can keep it safe with luggage:
- Your suitcase needs to be unique so you can easily spot it. A few ways to do it is to add a sticker, ribbon, or bright colors (to easily identify if there similar suitcases like yours).
- Look for the name tag. Tags can further verify if the identified bag is yours.
- We highly suggest you write your contact information in multiple places inside and out of your bag when you are packing.
- Bags getting lost is common and you’ll need to contact the airline.
- In case your bag didn’t make the final destination your airlines can help deliver your bag or file a claim.
- Once you receive your bag check for any physical damage.
Step 4: Customs
Note that customs take much longer than immigration and will include a CBP official interview. Now, this particular interview is nothing big to panic about, but it’s always a good idea to get yourself prepared.
Here are some questions you’ll need to prepare for during the interview:
- Questions about your stay in the US
- The place where you are attending the university
- What you’ll be studying during your stay in the US
- Your plan to pay for your education
- If you have all the relevant documents with you and provide it to the officials when asked
At the Airport – Step 5: Get a Ride to Campus
The ideal scenario is going straight to the campus once the customs are done. But if you have landed in a different location then you’ll need to catch another fight and proceed further.
Before you catch a cab you can check if your university or your consultancy has set any travel arrangements for you.
If you are arriving early at the campus, inform the university officials so they can get your housing ready for you or provide alternatives for a day.
People Also Ask (PAA) :
1. What are the initial steps upon landing at a U.S. airport?
After disembarking, follow signs to Immigration and Customs. Here, a U.S. Customs and Border Protection (CBP) officer will review your travel documents, including your passport, visa, and any required forms. Ensure all documents are completed accurately to facilitate a smooth entry process.
2. What documents should I have ready for U.S. immigration?
Be prepared to present:
- Valid Passport: Must be valid for at least six months beyond your intended stay.
- U.S. Visa: Appropriate visa for your purpose of visit.
- Customs Declaration Form: Completed during your flight.
- Supporting Documents: Such as an I-20 form for students or an employment letter for workers.
Having these documents readily accessible will expedite the immigration process.
3. What should I expect during the customs inspection?
After immigration, proceed to Baggage Claim to retrieve your luggage, then head to Customs. Officers may ask about the purpose of your visit and the items you’re bringing into the country. It’s crucial to declare all items as required to avoid penalties.
4. Are there any COVID-19 protocols to follow upon arrival?
As of recent updates, travelers are advised to:
- Vaccination: Be fully vaccinated with an accepted COVID-19 vaccine.
- Testing: Obtain a negative COVID-19 test result before departure.
- Masking: While optional, wearing a high-quality mask is recommended in crowded areas.
Protocols can change, so it’s advisable to check the latest guidelines before traveling.
5. How can I navigate the airport to find transportation after customs?
After clearing customs, follow signs to the Ground Transportation area. U.S. airports offer various options, including taxis, ride-sharing services, shuttles, and public transit. It’s helpful to research your destination’s transportation options in advance to choose the most convenient method.
For a comprehensive guide on navigating U.S. airports after landing, visit University Hub.


